|
Customer Online Setup
|   |
|
Customer Online Setup
| |
CUSTOMER ON-LINE SETUP
The PPG CDN depends on setups made in Customer On-line and Customer Entry. Certain entries must be made before a transfer can take place. In Perfection Management, go to the Customer On-line menu (10.6.2), and option 3, Customer On-line Setup.
We will run through these setups by numerical assignment below using the pictured examples.
![]()

3. Default Counterperson for the CDN orders should be entered here.
4.The Price code to display on the orders is set here.
5. Any system message will be sent to this port.
6. Any alerts for order arrival will be sent to this port.
7. A numerically assigned printer MUST be added here. The Printer Assignment is for successful orders. The Error Assignment is for errors encountered during the transfer and will be the ONLY way to see those errors. Slave printers are not permissible at this time.
![]()
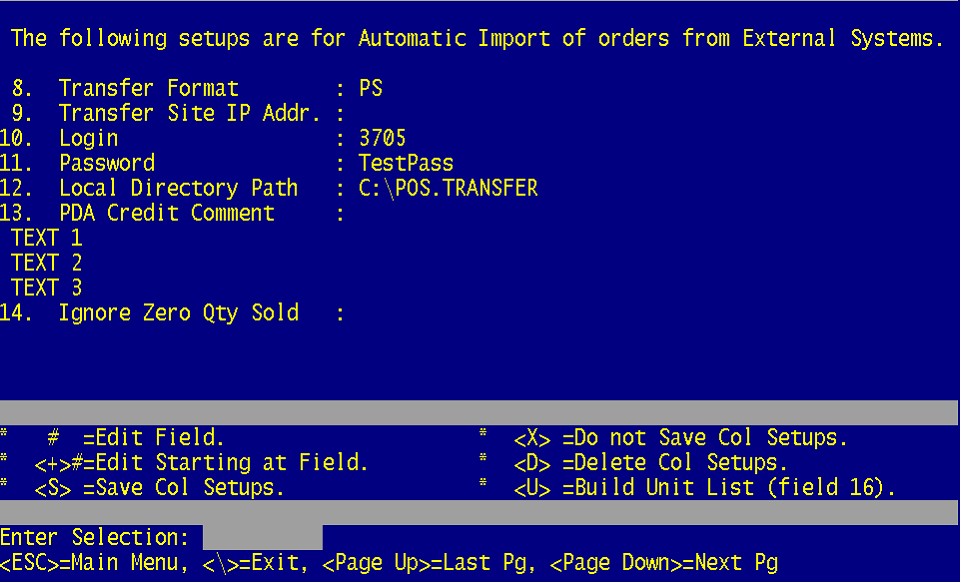
8. Transfer Format is going to be PS for Perfection Software.
9. The Transfer Site IP Address is left blank.
10. Enter your numerical login here. If you do not already have this you can contact Perfection Software for it.
11. Enter your password here. If you do not already have this you can contact Perfection Software for it.
12. This will always be C:\POS.TRANSFER (or the drive letter you use for perfection, such as C/D/E) If this is not created you will need to create it before you enter this path. You will also need to create a directory for C:\POS.TRANSFER\RESULTS.
13. Can be ignored for now.
14. Can be ignored for now.
![]()
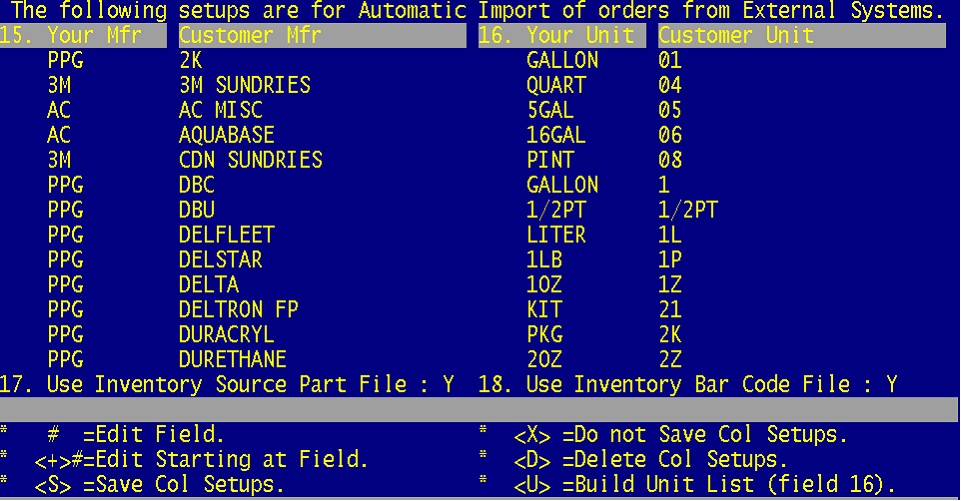
15. Your MFR is the MFR in your system, the Customer MFR is for PPG and the end user as the above example illustrates.
These will need to be entered manually.
16. Your Unit is the Unit in your system, the Customer Unit is for PPG and the end user as the above example illustrates.
These will need to be entered manually.
17. This will typically always be N for No.
18. This will typically always be N for No.
***There are examples at the back of this document of these units as they appear in the Perfection Software System with the typically associated customer unit of measure. However you may wish to review these to ensure they are accurate and make changes as required. ***
![]()
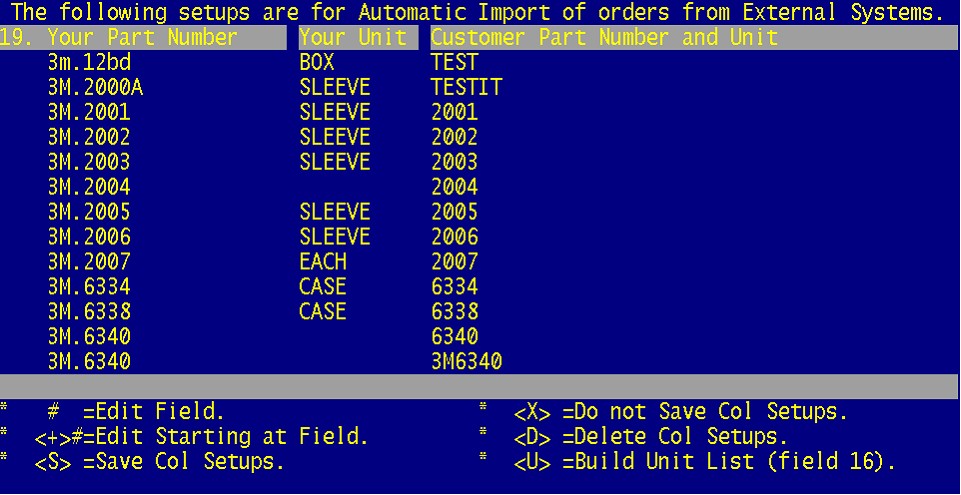
19. Specific Part Number Mapping. This is to account for part numbers that cannot be translated normally. Enter your part number as it appears in your system on the left and as it appears for PPG and the customer on the right.
To take the first part number in this list as an example, 3m.12bd. A PPG part number may be of the format BD0963 so we would need to strip this part number of the BD with the REMOVE 3M BD conversion function entered on line 20 as the next pictured example will show. Thus our part number 3m.12bd would also be stripped of its BD and would therefore need to be mapped separately here to avoid an error on this part number.
Additionally the unit could also be different as in the example;
3m.7184 PACK BD07184 PK
Here we see the end user/PPG uses BD07184 and the unit PK instead of PACK.
The end user/PPG may also use pack sizes as in;
SAS.6608 BOX BDNL GLOVE LG
SAS.6607 BOX BDNL GLOVE MD
SAS.6609 BOX BDNL GLOVE XL
And can be entered as seen in this above example.
Typically during the testing process errors highlighting which part needs to added will be printed out on the Error Printer chosen on line 7. There will also be a comment on the order reflecting this.
![]()
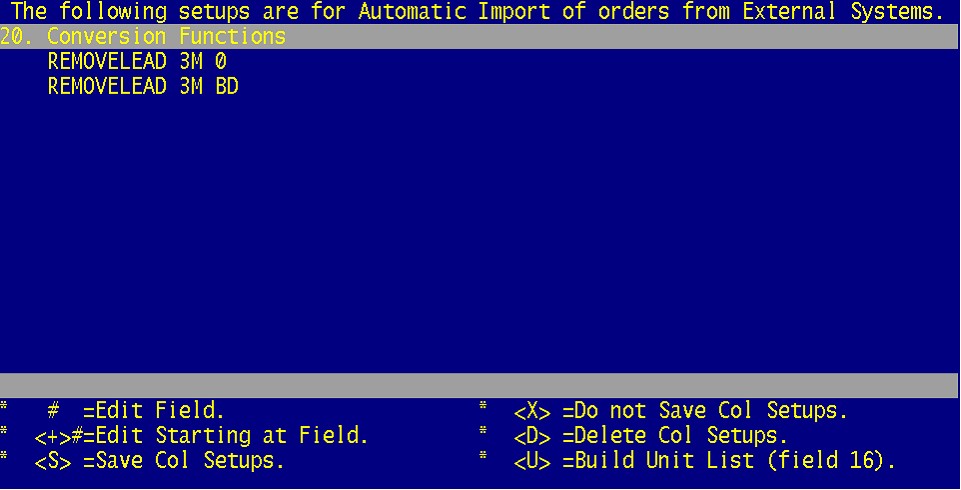
20. Conversion functions remove unwanted information from the part numbers coming from PPG’s system, such as leading zeros.
If we do a question mark in this field it will give us the following examples:
CONVERT
- Ex. CONVERT PPG "-" TO "" (This will remove all dashes in PPG Parts)
CONVERTU
- Ex. CONVERTU PPG "-" TO "" (Remove all dashes in Units for PPG).
PREFIX
- Ex. PREFIX STA 020 (This will prefix 020 to the front of every STA part)
POSTFIX
- Ex. POSTFIX STA 00 (This will postfix 00 to the back of every STA part)
REMOVELEAD
Ex. REMOVELEAD 3M BD (This will remove leading BD’s prior to the zero in say, BD0963)